Showing posts with label nursery. Show all posts

Tuesday, March 27, 2012

Pink + Gray Nursery Reveal

The moment you have all been waiting for is here...Hayley's room reveal!

Just a quick catch up for those that haven't been reading along. I am not pregnant. I wish I was, but it looks like that's not in the plans right now. Really I just have baby fever from all of you cute pregnant gals and your cute little babies. However, our wonderfully wonderful friends Daniel and Ruby ARE expecting a baby..a girl...like any day now. Around these parts Daniel and Ruby are referred to as the besties, BFF's, and "Uncle Dan" and "Aunt Ruby." That's just how we roll. Wow, I am just on a tangent today. Let's get to it, shall we?

Entering Hayley's nursery...


inspiration


So, what do you think?! This was most definitely a labor of love for a little girl who is already so loved. We honestly can't wait until she gets here so we can see her enjoying her new space. I mean seriously, she's got to be excited to get out of her current cramped corners right? Hayley, are you listening?!

I don't think I'll ever grow tired of seeing a space go from a simple idea to actual reality. It amazes me every time. I love that Daniel and Ruby gave me a lot of "creative control" and yet I would say they were some serious hard workers getting this done. They like to act all humble like they did nothing, but seriously they worked hard on their daughter's room. I will say one thing...I think we all agree that when you are pregnant, limiting the DIY is a good thing. I am pretty sure Ruby said that at one point. We had a LOT of DIY going on (many inspired by Pinterest of course) and well, Ruby, being the overachiever she is (seriously that girl can do more in a day than I can in an entire year, girl's got skills) decided to take on a bunch of projects. I loved her enthusiasm, but worried for her safety. All is well, she survived and from the looks on their faces I would say they are actually happy with the room. Good thing, cause that was our goal. So thank you to two of the greatest friends out there for trusting us enough to help design your baby's nursery. And thank you to my partner-in-crime...the hubsters...for the five million trips over to the house to install yet another shelf, paint another wall, and answer another mathematical question. That guy rocked it. AND thank you to all of you lovely readers for actually believing in me and pushing me to get these photos taken so you could see it. I was a little worried, but hey the only opinions that mattered were those of the parents (and baby of course!).

So do you like it? Anything in particular you have questions about? I'll try to remain respectful of Daniel and Ruby's privacy, but if you do have questions please don't hesitate to ask! Anyone notice that we kind of are pushing Hayley to become a reader....the girl's got no chance.


 *I'm hoping to update the photos as we finish a few things up. The gallery wall will be finished once Hayley makes her debut. The frame around Hayley's name is being touched up so the strange glimmer you see is just some unfinished painting that needs to be done...actually it may already have been at this point. 


**I'm also hoping to either A) Happen upon a new lens so that I can get crisper photos or B) Take some photos in the earlier hours when the sun is on that side of the house to get some better shots. This may help show that the walls are all in fact the same shade of gray. Sadly, the kit lens had a bit of a hard time capturing everything perfectly, but it got the job done, what more could we ask? 


Tuesday, March 20, 2012

A Sneaky Peek

All the constant whining and nagging on your part worked. Ok fine there was no whining or nagging, but there was a lot of "hurry up and post photos of the BFF's baby nursery already!"

You know I'm not one to disappoint.

Well at least I tryyyy not to be.

So, this is a teeny tiny pink into Miss Hayley's soon to be occupied room.

Ruby just finished the mobile so I just need to get myself over to take some photos of the room! I can't believe Hayley will be enjoying her new space any day!

Wednesday, May 18, 2011

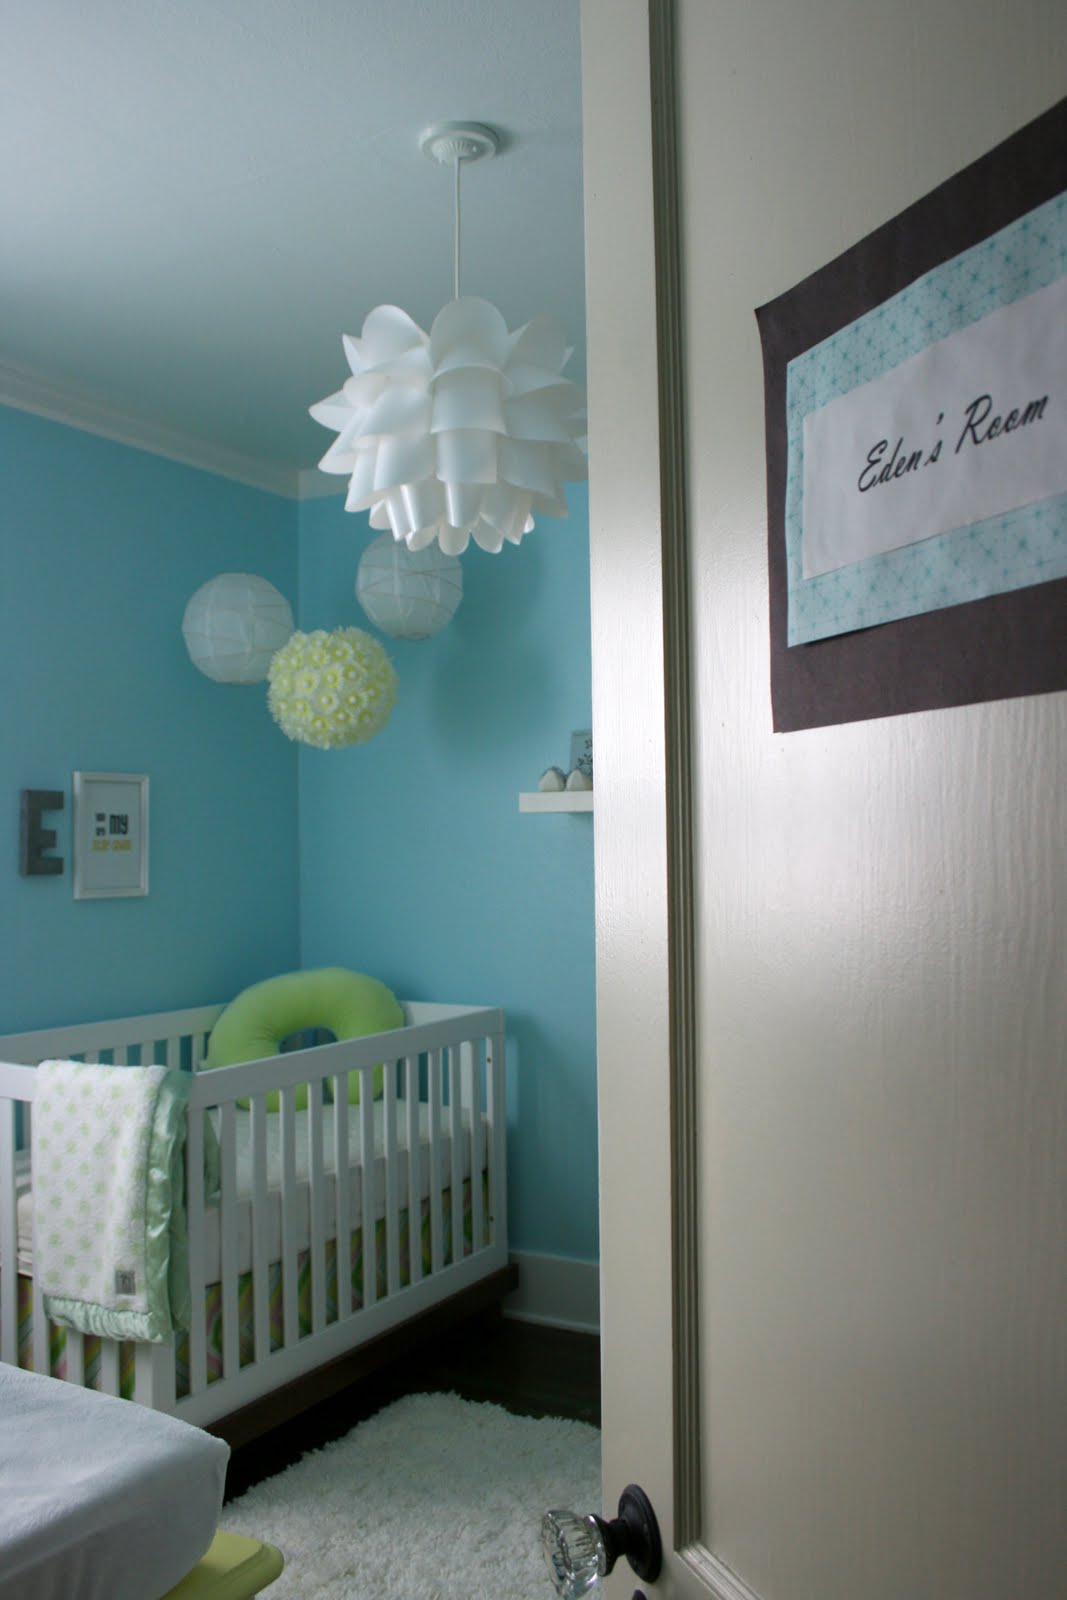
Eden's Room Revisited

Okay, see what happens when I go out of town and don't get all caught up on my blog reading? Eden's nursery was featured on one of my favorite go to websites, Spearmint Baby and I MISSED IT. How does this even happen?! Anyway, for all of you that are visiting from over there, welcome...glad to have you! Take a look around and stay awhile...although you may quickly come to find that I am quite crazy and typically say weird things and put myself in awkward situations. 

Oh and for those of you that have hung around here for awhile and have already seen the room reveal, you may want to go check it out again...I added a few new things...or just head on over because there is some GREAT inspiration to be had. Honestly I was all over that blog during pregnancy getting ideas and just enjoying all the different features. It's quite fantastic!


Alright, I am going to go bask in my fame now change a dirty diaper. Oh the life of a mother, no time to enjoy being a star...and I wouldn't have it any other way.

Friday, January 28, 2011

Baby on the Brain

Since there seems to be a giant wave of pregnant woman, most of them having girls, I thought it fitting to design a nursery for a boy. Oh drats, I got that mixed up, I should have given some inspiration to all the mommy's needing GIRL nurseries. Well, sorry, I was in the mood for all things boy...especially seeing that I am in a girl's nursery each and every day.

So, please take a gander at my navy and citron nautical outdoor inspired nursery. Can you tell I just cannot do themes? I think God put something in me that keeps me from even being able to stick to a theme for more than 2 items. Seriously, I have design ADD.


Color: Sherwin Williams Navy SW6531
Crib: Ikea 
Lamp: Ikea
Rug: Dash and Albert
Light: Ikea
Cabinet: Ikea
Rocker: Overstock.com (the same one that we used for E's nursery)
Coat hanger: DIY (this would be so fun and I think easy to make)
Porthole Mirror: Amazon.com $21
Chevron fabric for crib skirt: fabric.com 
Wood planter: Ikea
Aluminum boxes: Ikea
Alphabet Wall: DIY, or would use this alphabet subway art
*Click on the link below the mood board to see the items and the prices

When I started this nursery, I knew I wanted navy. Yeah, NAVY walls. Daring? Yes. Totally the most rocking color ever? ABSOLUTELY. I honestly thought that with the navy I would choose orange as an accent color. It just so happens to be Josh's favorite color and the color we would have used instead of yellow and pink if Eden were a boy. Well, just as inspiration goes, I was suddenly hit hard by the urge to use citron with the navy. I literally fainted at the absolute fabulousness of that color combo. Okay, well I didn't literally faint, but I thought about it.

Despite this being a "dream" nursery (since there are no signs of bambinos anytime in the near future) I still tried to keep it to a budget, just as I would if I were designing it for a real live baby. This meant shopping where regular people shop, and not choosing furniture that cost as much as my house. Oh, and as usual I chose to shop "outside the box" by choosing items that were not necessarily in the baby section of the store. What can I say, I like to walk on the wild side...

What do you think? Would you be ready to be daring and have navy on the walls? Oh and for my two friends that are actually having boys, here's to you! 


Wednesday, September 8, 2010

Eden's Room: Budget Breakdown


I'm baaack! Here you were thinking I was done, but the truth is I have one more thing in store. I think many people are worried that designing a room is going to be extremely costly. I am here to say it doesn't have to cost a lot to have the room of your dreams. Honest. All it takes is a bit of extra sleuthing for perfect deals and some DIY and you have a room that fits your budget. Hang in there and see where all of our money was spent.


When we started out we did a little estimate of what we thought it might cost. Our  goal was to be under $1,000. I will say that we did have some very generous family members who gifted some of the items which gave us a little bit more money to play with in the end (this came in handy when I couldn't find a super cheap fabric that I actually liked for the closet). All larger gifts will be noted so that you can see what we spent as well as what we would have spent if we had paid for all of the items.

  • WalMart Crib: $300 (gift)
  • Overstock Rocker: $166
  • Sherwin Williams paint (wall, ceiling, primer, trim, and dresser): $50 (used less than half of each gallon, the rest was used in other rooms)
  • Dresser: $25 (dresser $20 on Craigslist, $5 on supplies)
  • Serta Organic Crib Mattress: $200 (gift)
  • Ikea Knappa Pendant Light: $30
  • Gap Organic Crib Sheet: $15
  • Changing pad and cover: $42 (gift)
  • Crib skirt (made by me): $24
  • Closet curtains (made by me): $50
  • JC Penney roman shades (2): $53
  • TJ Maxx ottoman and footstool: $25
  • HomeGoods rug (we bought two and attached them together): $80
  • Paper Lantern Mobiles (Ikea and World Market): $20
  • Target Lampshade: $15
  • World Market pillow: $13
  • Mirror (we took an Ikea frame and had a mirror custom made): $55
  • Ikea frames (various sizes): $11
  • Ikea shelves: $30
  • Ikea baskets: $24
  • Accessories (most were already owned or gifts)
  • White Dresser, bookshelf, lamp, 2 large frames: already owned
      Total (not including gifts): $686     ~     Total (including gifts): $1,228

Even if your budget needs to be even smaller, it is definitely doable! A big way to save is to go to thrift stores and just fix items up with some paint as needed. Any budget can get you a great room. This is Josh and I saying go out and fix up a room that you LOVE on a budget. It can be done and it will make you feel fabulous in the end.

**Thank you so much for all of your super kind feedback on Eden's room. You make Josh and I feel like superstars and we totally appreciate it! It makes us encouraged to keep on renovating and sharing each step of the process with you. So from the bottom of our itty bitty hearts, thank you!

Tuesday, September 7, 2010

Eden's Room: The Reveal


Welcome to the FINAL edition of Eden's Room! Can you believe we actually finished? I sometimes can't. It was a lot of blood, sweat, and tears, but so very worth it. We are IN LOVE with the result. Before I show you around the room, let me start with "Before" photos so you can see what we were working with when we first moved in...
 

BEFORE

Looking at the pictures of this room just stuns me. Hopefully seeing the after photos will stun you as well...

AFTER
Some details about the crib corner. The paper lanterns were bought at Ikea and World Market. I chose to leave two plain and DIY the third one to give Eden a little something to catch her eye. All it took was a super cheap flower garland and some white pom poms. The frame next to the crib was actually a print that my mom had given me years ago. I just spray painted the frame and added in my own art which says, "You are my starshine." Yes, we do realize that it is supposed to be sunshine, but ever since Josh and I were married I have always sang it with starshine. The 'E' was a fun find from Anthropologie which we fell in love with.

The shelves were accessorized with items that were either gifted or something that we already had. I had a lot of fun putting it together. Oh and see the top shelf there? Yes, Eden has her very own set of Minnie ears thanks to her grandma.


Here is a close-up of the crib skirt. I made this using some hem tape (really...like I could sew!) and added some velcro so we can take it off to clean it or adjust it as needed. The great thing is we saved a TON of money by doing this. A lot of the crib bedding sets that we had looked at ranged from $160-300. Our total for crib bedding (since we had chosen not to do a crib bumper) was a mere $39. Seriously.


I couldn't resist a photo of our lovely pendant light shining in all its glory. I am in love with this thing.


Yes, the frames are empty, but not for long. We have plans for the empty frames, but we have to wait for a certain little girl to show up first. Oh and you can only see a tiny little bit of the corner next to the changing table, but it houses the diaper pail and the laundry basket. The basket on top of the changing table holds diapers and the jar next to that has a whole bunch of pacifiers in it (you know, just in case she needs a little something to calm her while getting her diapers changed).


I could not resist a photo of her shoe drawer. I love them. Oh and I added a piece of scrapbook paper into each drawer to add a little extra pizazz...it is just one of those details that I couldn't resist.


I would rather shop for a baby girl than myself any day...good thing I can now!

A close-up of the closet fabric. Again, I went ahead and made them myself. We decided early on that we wanted to get rid of the doors on the closet since the room is so small and the closet doors were NOT functional. I once again used hem tape and it really wasn't too difficult at all. Honestly it makes the room feel so much larger.

Well, there is the room! I hope you all like it because we certainly do. Oh and for fun, let me tell you about our inspiration for this room. We came up with the style and colors using our diaper bag, Amy Butler fabric, and a pair of my pj shorts. Honestly, inspiration can come from anywhere! Here is our diaper bag for reference...


Well, that's all folks! Hope you are all still alive out there after that long post. For some laughs here is an old post that I did before I knew I was pregnant.

If you want to look back at all of the chapters of Eden's room here they are: Chapter 1, Chapter 2, Chapter 3, Chapter 4, Chapter 5

Monday, July 5, 2010

Eden's Room: Chapter 5


I am still alive! We have been struggling with a internet provider and have been without reliable internet for quite some time. The good news to being away from blogging was that we got a lot accomplished during that time. This makes me happy since I all of a sudden feel super pressed for time. Now we can FINALLY reveal Eden's dresser/changing table.

When we were searching for a dresser that we could use as a changing table I had the exact look I wanted swirling around in my little head. I wanted it to be long enough to accommodate a changing pad, lamp, and a basket full of necessary items to have on hand during frequent diaper changes. I also wanted it to not feel too heavy. That may not be the best description, but its the only way I could think of to convey what was in my head. Another must have? It had to be under 40 bucks. Oh and in case I wasn't picky enough, I also was hoping for something old...like at least 30 years or so...but even older would be more spectacular. Oh and by the way, I did find something with each and every one of these qualities, and yet WAY better than what I had even envisioned. Want to meet her?


Here she is! Isn't she a beaut in all her purple glory? Okay, that was sarcasm. I couldn't wait to get my hands on her and change her up a bit (okay really it was Josh's hands, not mine that were going to do the work). The great thing about this baby? She was only 20 bucks! I found the dresser on Craigslist and fell in love instantly. It was listed at $25, but the lady ended up asking for 20, score! This dresser gave me a good panic attacks as Josh had initially contacted the lady and we spent quite some time without hearing back from her at all. To us that meant it was SOLD SOLD SOLD. I was quite upset. Thankfully it hadn't been sold and so it was ours. Once we brought it home it was time to fix this baby up (which was necessary due to the thick layers of paint and a smell I cannot describe).

First Josh stripped it using Citristrip (it's natural, smells like oranges, and works great!). Two coats ended up being necessary since we waited a little too long to start stripping the dresser the first time around. Stripping paint off such an intricate piece was not easy or fun for Josh, but thankfully he is THE MAN and got it done.


The next step was to clean up the leftover stripper with lacquer thinner. Even after that process the dresser needed a little more help. During the process we found that the dresser was made in the 50's. The dresser was indeed old and I love that. This also meant that the layers of paint were a little more stubborn. We ended up agreeing that a quick run of the belt sander would do the trick. We are so glad we did that because the result was beautiful!


It was almost too pretty to paint over! However, we really wanted to paint the dresser so we went ahead with our plan. Here it is painted in Sherwin Williams Fun Yellow. The hardware was spray painted with a glossy black to give it a little more shine.


We were so happy with the way she turned out! She fits in perfectly and I think Eden will enjoy her dresser for many years to come. The next step is accessorizing the dresser...

Tuesday, June 22, 2010

Eden's Room: Chapter 4


We are back with another update on the nursery! This time we were tackling the crib, which I would say was the most important aspect of the entire room considering we would like our daughter to have a bed and not sleep on the floor. Our crib was actually a gift from my dear sweet mom and dad. We LOVE it! Picking the crib was no simple task, which I am sure any parent can attest to. We knew we wanted a modern crib, mostly white, non drop side, solid wood, and non-toxic paint. We also knew we wanted something under $300. Well, we got lucky and found one at none other than WalMart (or Wally Word according to my family). The price? $299.88, a whole 12 cents below our budget! We couldn't believe our luck finding something that met every single one of our criteria at such a low price. Thank you WalMart for your ever popular rollbacks! Before you see the end result, I figured I would throw in a couple pictures of the crib installation...


Putting together the crib was so easy! We were so pleased with the ease of instructions and the final result. Now all we need is a crib mattress and some bedding and our girl is set. 

Oh and you may have noticed the hole in the wall in the second picture. Well, let's just say that 80 year old houses sometimes like to house mold. We were not happy campers when we found that, but don't you fret, that mold has been shown the door. Mold is not a welcome guest at the Crain household. 

**************************************************

An addition to Chapter 3 where I promised some information on paint. For the nursery we decided to branch off from our usual No-Voc Olympic paint to try Sherwin Williams No-Voc Harmony paint. The reason? We honestly had not been all that impressed with the Olympic paint after using it twice in our house. Sorry Olympic, maybe next time. I have to say that we were quite pleased with the Sherwin Williams paint! It was still a tad thin, but we always do two coats no matter what so it didn't bother us too much. The wall color is Quench Blue and the ceiling and closet color is Timid Blue. Both turned out very well and we are just pleased as punch knowing that our daughter will be breathing clean air and not fumes. Oh and I almost forgot the best part! We happened to see that Sherwin Williams was having a 25% off sale on all paints (this is actually what prompted us to use their paint in the first place) so we didn't even have to pay full price. SCORE!

So, that is our latest update on Eden's room. However, I have a secret. Since then we have finished a dresser/changing table redo and installed a new lighting fixture. More to come on that one later!

Tuesday, June 8, 2010

Eden's Room: Chapter 3


You are all way too anxious to see the nursery colors so without further adieu, here is a sneak peak into the room...


I will provide details on the paint after this weekend once the crib is up! Yes, the crib has been sitting in a box for a week and it is driving me bananas. Thankfully we will have time on Saturday to put it up and we are like two giddy school children getting ready for summer break. Oh wow, summer break. Wish I had one of those. Anyway, I will hopefully have some better light to work with this weekend so that I can get some better photos of the room. Be back soon!

Sunday, June 6, 2010

Eden's Room: Chapter 2


It's time for another chapter of Eden's Room. A couple of weeks ago, Josh and I made a calendar from May-September so that we could plan out each of the things on our to-do list for her nursery. I would like to say we have months to get her room done, but unfortunately due to the fact that Josh and I only have Saturday's together and every weekend in July is filled with events, well we only had June to really get it done. Oh and if you are wondering, the reason August is not in the equation is because I have a compulsive disorder when it comes to planning, I wanted her room to be done AT LEAST a month in advance. Josh wants it to be done early so he doesn't have to take care of me when I have a nervous breakdown. The good news is, since we do not have air conditioning in our house, having her room done before the real heat hits is going to be so nice. Plus I have plenty of other projects in mind in preparation for her arrival so it will give me plenty of time to get it all done.

With last weekend being a three day weekend for us, we were set on getting a lot done. One of our big projects was installing crown molding and painting all of our trim. The task seemed easy in theory, but let me be the first to say it was the hardest work we had done in awhile. Our trim was oil based (that's all they really used 80 years ago) and without checking we were assuming it was also lead paint. Both of these pose just a bit of a problem, especially for child bearing folks like myself. So how did we make lead based oil paint disappear without causing any health issues for our future love child? Just takes an extra step...really!

In order to paint the No VOC, low odor latex paint that we had chosen for our nursery we had to prime over the yellowed oil based trim paint. To do this we picked up the Zero VOC, low odor Kilz water based primer at Home Depot. Now, ordinarily you would want to lightly sand the oil based paint before priming, however due to our lead concerns we skipped this step and just used the primer right over the oil paint. I should say Josh also went through with mineral spirits and wiped down all the trim to clean it up beforehand.

Once the trim was all primed, we then took the Sherwin Williams Harmony stock paint in semi-gloss (Harmony is also No VOC and low odor) and painted over all the surfaces. We swear by using the stock paint, it is such a perfectly bright white and really freshens up a room!

 The closet all primed and painted

Once all the surfaces had been primed and painted we were ready to put up the crown molding. My dad actually joined us for this part of the project and helped to get all the pieces cut at a 45 degree angle. Having 80 year old walls and ceilings meant not so perfect lines, but nothing a little caulk couldn't fix. Once again, the change was so refreshing. What was up before was not actually crown molding, was very thin, and did not meet up with the ceiling. The new crown molding was much thicker, was flush with the ceiling, and matched the era of the house much more than the previous one. Don't believe me? Look at the difference below.

Old Crown Molding

New Crown Molding

I have a photo of a before and after of the trim, but you will have to wait to see it because it gives away this weeks project. Let me tell you, this week's project was BIG. Well, big in the fact that it absolutely made the room. More about that later...

**For all of you on pregnancy safety watch, I do wear a respirator mask while painting and again we do use all zero VOC and low odor paint. Trust me, Eden is quite safe during the whole process!


Thursday, May 13, 2010

Eden's Room: Chapter 1


Welcome to the first chapter of Eden's Room. We want to share every dirty detail of the nursery progress so we thought we would start with the first purchase for her room that arrived YESTERDAY! Without further adieu, the rocker.


Blogworld meet Eames look-a-like, Eames look-a-like meet the Blogworld. This here is where we will rock our little girl to sleep, read her books, or just plain sit and enjoy. We ordered this chair four days ago on Overstock.com after falling IN LOVE with the Eames rocker. Unfortunately, our wallets did not like the prices for the original Eames, so we went for second best (which truthfully doesn't feel like second best at all). This rocker only set us back $166.99 which compared to the real thing or really any of the other rocking chairs and gliders that we looked at, well it was a steal. Our criteria for a rocker was: smaller in size, white, easy to clean, and modern. With this rocker we were able to meet each and every criteria. The size of the rocker is PERFECT in our very modest nursery which measures a mere 8'x9'. Still bigger than some, but when you have one wall that's taken up by a closet it really leaves little room to maneuver.

All in all we are very happy with our purchase and it just proves that you don't have to spend a lot to get what you want. We are aiming to get great quality at the best prices possible so you can keep us accountable to that. I do want to add that if you have this same goal in mind, give Overstock.com a try. I am continually amazed at the products that they sell. I am not even being paid to say that, it just so happens that we love their products and service so much that we like to promote them.

Next up in Eden's room will be ripping up the carpet to expose the beautiful dark hardwoods underneath and finalizing our fabric choice so we can settle on a wall color. Hopefully the next chapter will be coming soon!